

The application of acrylic nails is fairly simple. While there are hundreds of at-home kits for the do-it-yourselfer, salon quality acrylic nails can rarely be achieved on your own. With a salon manicure affordably priced around $30, many women prefer to have their nails done por a professional.
First the nail technician will remove any polish o residue from the fingernails. Next, she will buff down the nails to create an abrasive like surface. This creates ridges for the nail glue and acrylic to latch onto which makes it last for weeks. Plastic nail tips are attached on the edge of your nail and cut to the size and shape tu prefer. Acrylic powder is mixed with base oil which helps create a gel. Using precision technique and a small paint brush, the technician will apply the acrylic over parte superior, arriba of the nail and plastic nail tip. Once all the nails are finished the technician will file and buff until the acrylic offers a luster shine similar to a real nail.
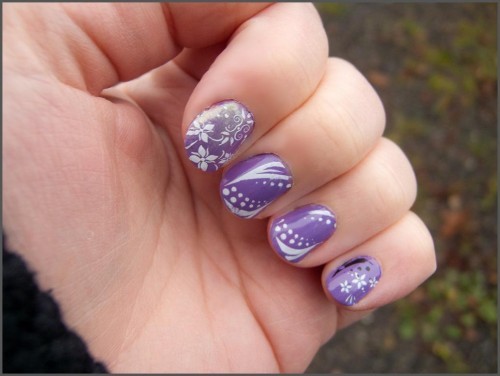
The siguiente phase is where acrylic nail art comes into effect. When tu walk into a salon tu will see posters and nail chains displaying different designs. The nail chains typically feature 20-30 nail designs painted on artificial nails. tu can line these up with your fingernail to see what they look like and if they would be ideal for your wedding day. Many salon technicians prefer that tu to pick out a color o diseño that tu would like before the manicure begins. Also bring a swatch of your wedding colores with tu if tu would like the technician to incorporate them into your nail design. Acrylic nail designs are painted on using a combination of airbrushed nail paint and tiny precision brushes. link
The final step in the process involves a UV gel capa placed over parte superior, arriba of your nails to help the acrylic nail art stay and the nails last. tu will be asked to sit with your hands under a UV light for a few minutos to help the acrylic set and harden.