

I got bored, so decided to make a guide to a perfect computer generated WDMD characters,even though tu think it's easy, it's actually not on the computer, so here we go! this is part one, where we will be drawing Dexter, normally, later we'll get into different costumed versions, and styles of the characters SO here we go!
1. start like tu would drawing dexter on a normal piece of paper. with a circle, using the circulo, círculo button, and a square using, what else? the square button! then using the line button, put a line through the image, as shown in the picture below.  these, will be your computer guidelines.
2.now, start putting detail to the image, using the line button ot sort of, sketch out dexter's outfit, using the circulo, círculo button, to do the first part of Dexter's hand. 
3. now onto the facial features, this is a hard part. first we start with the head, using the curve line tool, it's a little tricky, but tu can get it,draw out the ear, the side of his face, and his mouth and nose. tu may have to use mutiple lines on the ear to make it easier on yourself, o using the circulo, círculo tool, carefully make an oval, and using the paint tool, painting out part of the side linking to the face, tu can begin to get rid of some of your guidelines now.Oh and be sure to start the line that enlaces his nose and mouth to his glasses, like in the pic. 
4. now for the glasses, this is a tuff part too, but I have an easy trick, to start the basics off, make two circles, like below 
5. now, switch your paint color two white,and do a line through the circles, like so, and carefully paint over the parte superior, arriba part of the glasses, like below, also piant over and lines that should'nt be there, except guidelines: 
6. now,finish the glasses with afew más black lines. like below, use two más smaller circles to make the lenses, and then do what tu did in step five again. the results should look close to this: 
7.now to the worst part.....the hair. this'll be fun!we'll start with the basics. for the parte superior, arriba part of his hair, do a very slightly curved line like below: 
8. now we do the side curvy line, just follow the picture, you'll do fine. 
9. ugh....the curls...The terrifying hard to make on a computer curls! I hate this part it's so hard! tu have to carefully place the curves of lines, using two o más lines for each curls I did my best, I hope tu guys can too, besure to erase some más guidelines when your done: 
10. now we add some más details, starting with his hand, carefully using the curve lines tool draw out the fingers, there's three mostrando in this picture.erase the circles one you've finished the hand. 
11. now, the pupils,I have no idea how to explain this, so here's the pics on what I did: 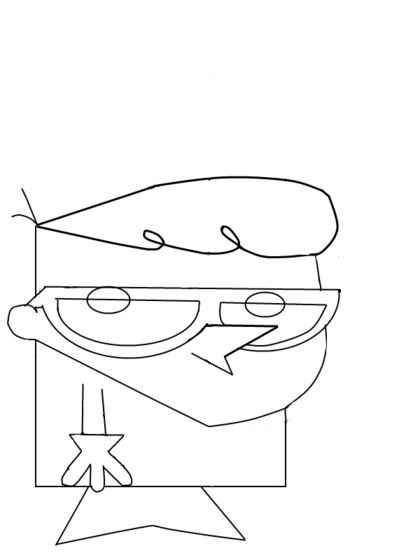
12. 
13. 
14. 
15. now, do the rest of the sketch for his out fit, like in the picture below: 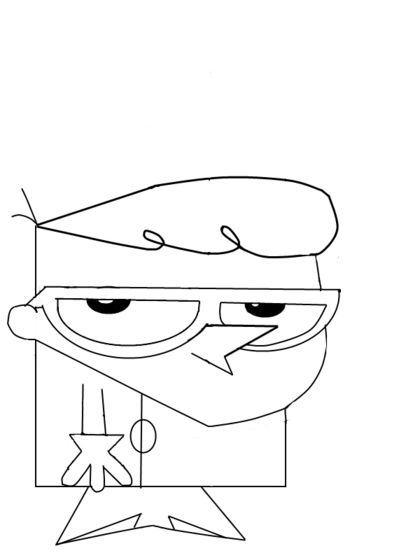
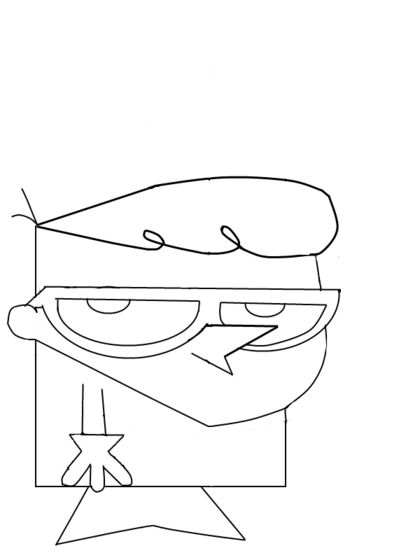
16. now erase your guide lines and add black to where needed. 
17. now we're ready to color, first add the basics, use whatever shades tu want for the first colors,we're gonna get a little más detail outta this dexter later: 
18. now using the line tool, we took a darker version of the skintone and already made the drawing look más detailed. we shall continue this as we go on. 
19. now we do the same with the lab coat, I use blue to shade the lab coat, though gray works just as well.also add some tone to the glove, to amke it más realistic, and your done! 
now, tu can keep adding details on your own with the coloring. o stop there your choice, have fun!!
1. start like tu would drawing dexter on a normal piece of paper. with a circle, using the circulo, círculo button, and a square using, what else? the square button! then using the line button, put a line through the image, as shown in the picture below.

step one completed, should look like, o close to this
2.now, start putting detail to the image, using the line button ot sort of, sketch out dexter's outfit, using the circulo, círculo button, to do the first part of Dexter's hand.

this is the small detail, we're not going into facial features yet, so this is easy, the hard part will be once we get to his curls on his hair, but i'll explain that when the time comes.
3. now onto the facial features, this is a hard part. first we start with the head, using the curve line tool, it's a little tricky, but tu can get it,draw out the ear, the side of his face, and his mouth and nose. tu may have to use mutiple lines on the ear to make it easier on yourself, o using the circulo, círculo tool, carefully make an oval, and using the paint tool, painting out part of the side linking to the face, tu can begin to get rid of some of your guidelines now.Oh and be sure to start the line that enlaces his nose and mouth to his glasses, like in the pic.

ok now we're in facial features, and as tu can see, alot of guidelins have been erased on mine, though if tu want tu can leave the guidelines in until the final drawing step.
4. now for the glasses, this is a tuff part too, but I have an easy trick, to start the basics off, make two circles, like below

two circles, try to make them match in size as well as tu can,you'll need it later
5. now, switch your paint color two white,and do a line through the circles, like so, and carefully paint over the parte superior, arriba part of the glasses, like below, also piant over and lines that should'nt be there, except guidelines:

if it looks close to this, your doing good,KEEP GOIN!
6. now,finish the glasses with afew más black lines. like below, use two más smaller circles to make the lenses, and then do what tu did in step five again. the results should look close to this:

i'll be teaching the pupils later,
7.now to the worst part.....the hair. this'll be fun!we'll start with the basics. for the parte superior, arriba part of his hair, do a very slightly curved line like below:

as tu see, like I dicho it must be a slight curve.
8. now we do the side curvy line, just follow the picture, you'll do fine.

ugh.....next is the curls......I hate that part.
9. ugh....the curls...The terrifying hard to make on a computer curls! I hate this part it's so hard! tu have to carefully place the curves of lines, using two o más lines for each curls I did my best, I hope tu guys can too, besure to erase some más guidelines when your done:

I've completely erased my guidlines, again, this is something that's optional till later.
10. now we add some más details, starting with his hand, carefully using the curve lines tool draw out the fingers, there's three mostrando in this picture.erase the circles one you've finished the hand.

the hand can be pretty tuff, as tu can see, even mine could be better, but on with the drawing!
11. now, the pupils,I have no idea how to explain this, so here's the pics on what I did:
12.
13.

adding the center to the pupil is optional
14.

ending result of pupil, tu can skip rule thirteen and just color the pupil black using the paint bucket tool
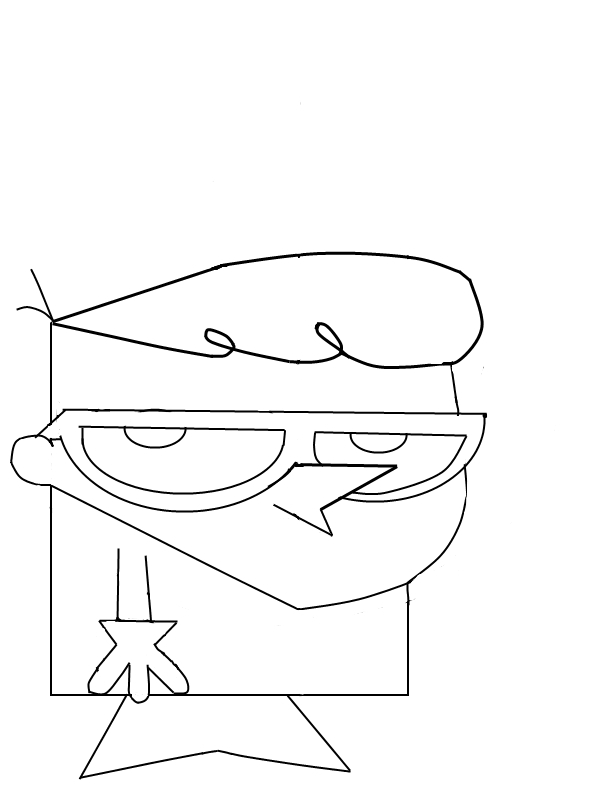
15. now, do the rest of the sketch for his out fit, like in the picture below:

16. now erase your guide lines and add black to where needed.

w tu have your line art, tu can stop here, o keep going as tu learn the best computer technique to color this imbecolic mad scientist, a mental note all of tu though, when drawing Dexter, color the boots black, but when drawing Dexi, leave the boots
17. now we're ready to color, first add the basics, use whatever shades tu want for the first colors,we're gonna get a little más detail outta this dexter later:

like I said, this is just a sample, use any shade of colores tu want to.
18. now using the line tool, we took a darker version of the skintone and already made the drawing look más detailed. we shall continue this as we go on.

only added a little darker tone of the skin to the side , yet it allready makes a big difference.
19. now we do the same with the lab coat, I use blue to shade the lab coat, though gray works just as well.also add some tone to the glove, to amke it más realistic, and your done!

here is the finished picture yea! we're done!!!
now, tu can keep adding details on your own with the coloring. o stop there your choice, have fun!!


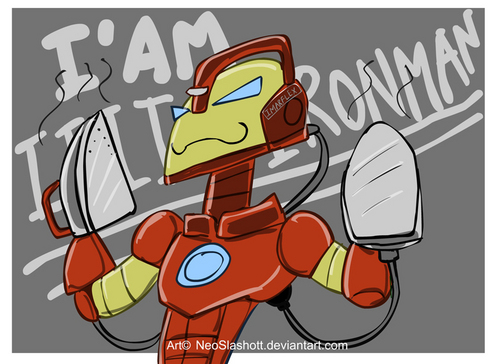

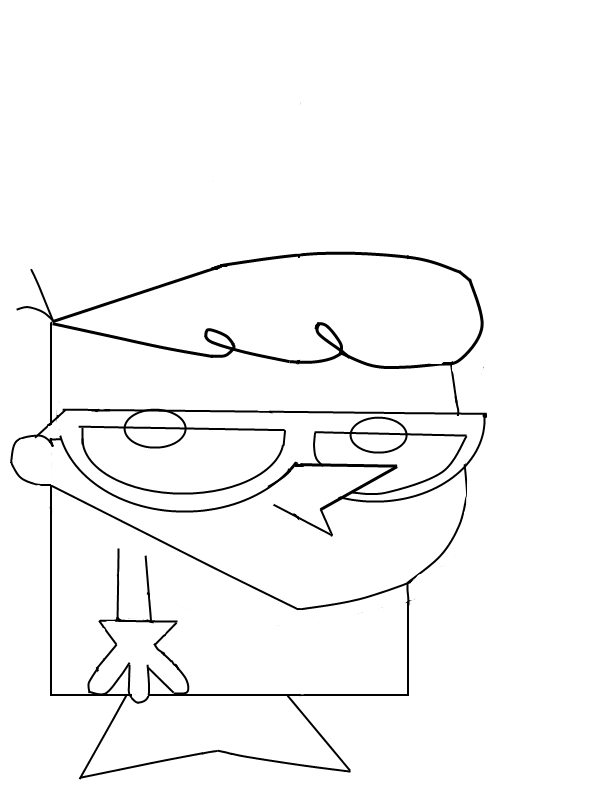
IDK why I put this pic it's just really funny!